Jett's room is pretty much ready for his arrival, but while I'm trying to pass the time as we ever so patiently wait, I decided to do a little crafting. I had some wood blocks cut back when we were working on the Airstream, & I've been meaning to make something out of them. So, here's what I came up with.

I bought some of those tiny paint samples from Home Depot for about $3 each. They'll get you any color you want. You get a lot more paint than you would from the craft store that way too.
WHAT YOU'LL NEED:

•Cutting Mat
•X-Acto knife
•Ruler
•Contact Paper
•Wood blocks or any other surface you want the letters transferred to
•Paint
•Paint Brush
•Printed sheet of letters of your choice in font of your choice | I used one of my faves Deming. It's free
here.
1. Cut each letter out carefully with the x-acto & ruler to make it nice & neat. To save a little time, you could print the letters onto contact or sticky paper instead, but I'm not sure if my printer would allow that. 2. Turn the letter upside down so it's backwards & trace it onto the back of the contact paper. I used one of the blocks & a small piece of painters tape to keep the contact paper from curling up while I was trimming.
 3. Place the letter exactly where you want it on the block (or whatever surface you decided to use). Make sure you smooth it out as much as possible.
 4. Paint over the entire surface. Or part of it. Get crafty. Do whatever you want!
 4. Now for the fun part! After the paint dries, carefully peel the contact paper off. If you want, you can lightly scrape the uneven parts away. I kind of like the unevenness of it though.
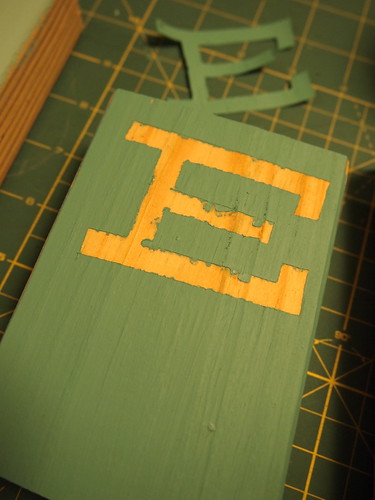
 And you're all finished!


Love the hand=painted look and uniqueness of each letter! Adorable.
ReplyDeleteThank you!
ReplyDelete